
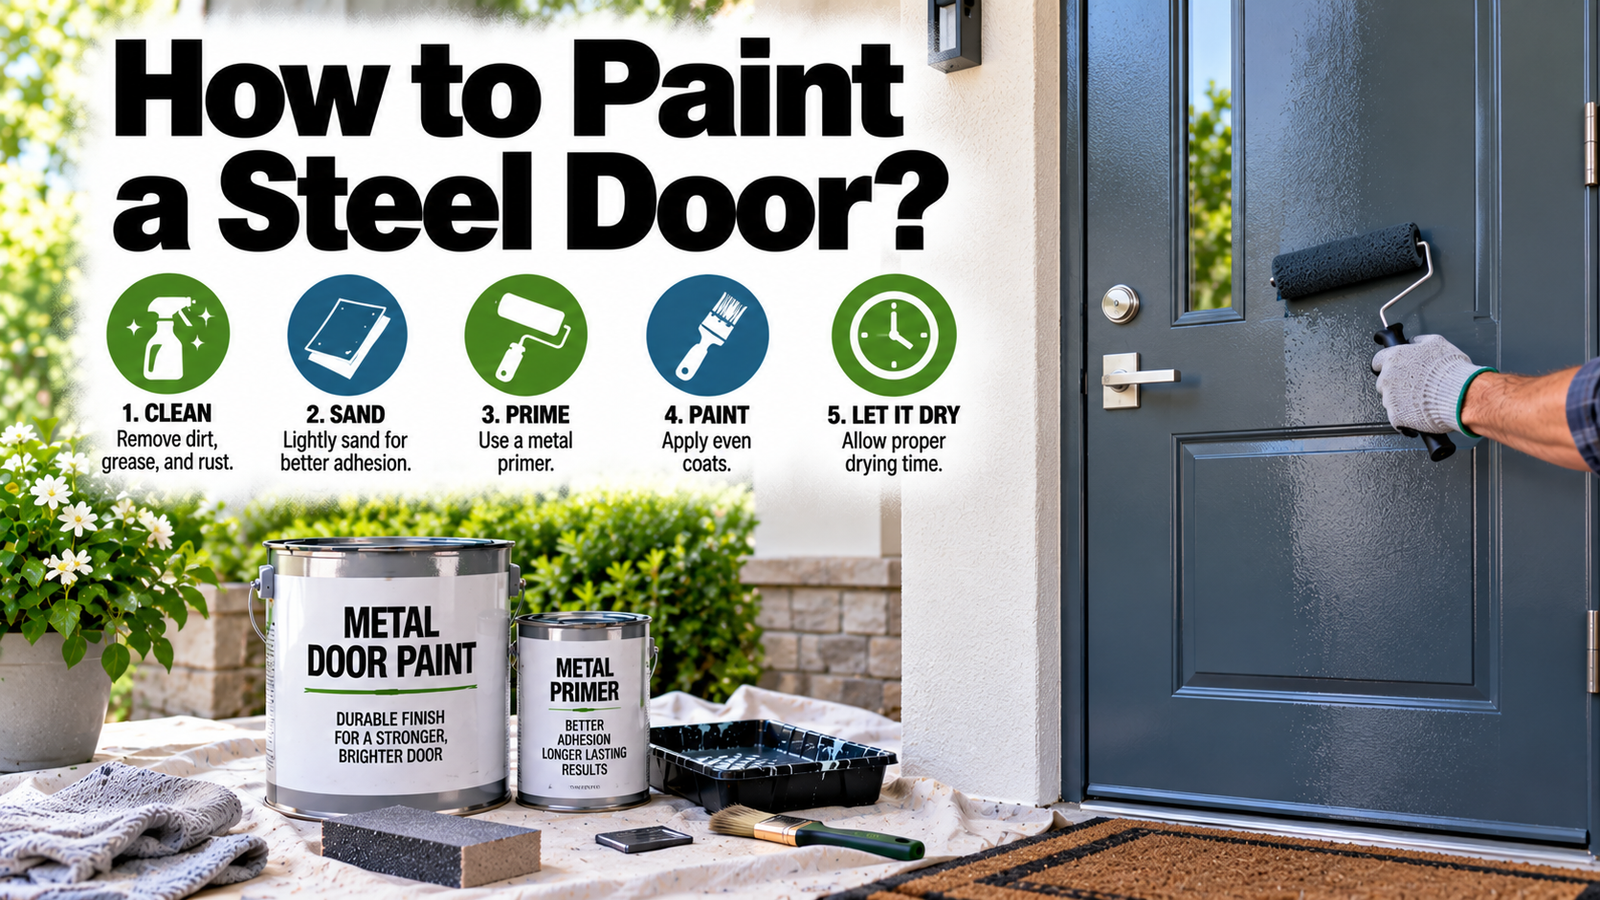

A fresh coat of paint on a steel entry door is one of the fastest ways to lift a home’s curb appeal, and it costs about a quart of paint plus an afternoon. Steel behaves differently from wood, though. It needs the right primer to grip, a little rust care, and a specific order and technique to end up smooth instead of streaked with brush marks. Get those right and your door looks factory-finished. Here is how to paint a steel door properly.
- Can you paint a steel door?
- What paint and primer to use
- The order and technique that avoids brush marks
- How to paint a steel door, step by step
- Mistakes that cause peeling and brush marks
- Conclusion
- Frequently asked questions
- Do you need a special primer for a steel door?
- What kind of paint is best for a steel door?
- How do you paint a steel door without brush marks?
- Do you have to sand a steel door before painting?
- Can you paint a steel door without removing it?
- Related Articles
Can you paint a steel door?
Yes, and it holds up beautifully when done right. Steel doors are built to be painted, and a good job resists weather, sun, and daily use for years. The whole thing rests on preparation. Paint fails on metal not because metal cannot be painted, but because it was painted over grease, rust, or a slick factory finish with no tooth.
One safety note before you start: if the door was painted before 1978, the old paint may contain lead. If you are unsure, test for lead before sanding or scraping, and follow the recommended precautions. It is a quick check that is worth doing on any older door.
A quick tip that makes the whole job easier: work in the shade, never in direct sun. Hot metal makes paint dry too fast, which leaves brush marks and stops it bonding properly. A mild, dry, overcast day is ideal.
It also helps to be realistic about time. Between cleaning, rust treatment, priming, and two coats with drying time in between, a steel door is usually a multi-day project even though the hands-on work is only a few hours. If you cannot take the door down and need to keep your home secure, painting it in place stretches things out further, since you are waiting on each coat with the door still hung. Plan the job around a stretch of mild, dry weather so nothing is rushed.
What paint and primer to use
The primer is the part people get wrong, and it is the most important choice. Use a rust-inhibiting primer made for metal. A standard water-based wall primer is not built for steel and can lead to adhesion problems and rust down the line. An oil-based or dedicated acrylic metal primer grips the surface and protects against corrosion. If you are painting the door a dark color, have the primer tinted gray, which helps your color cover in fewer coats.
For the topcoat, a quality exterior 100% acrylic latex paint is the standard choice. Acrylic flexes as the steel expands and contracts through temperature swings, so it resists cracking better than a stiffer paint. Look for an exterior formula, ideally with rust-inhibiting properties. On sheen, satin or semi-gloss is the sweet spot: both wear well and wipe clean, and semi-gloss adds a little more durability and shine. Avoid flat, which marks easily and is harder to clean on a surface that gets touched constantly.
The single biggest metal-door mistake: using an ordinary wall primer instead of a rust-inhibiting metal primer. That one swap is the difference between a finish that lasts years and one that peels.
You will get the smoothest finish with a foam or microfiber roller for the flat areas and a good 2-inch angled synthetic brush for the details. A foam roller lays paint down without leaving a heavy texture, which matters a lot on a smooth steel surface. Paint makers like Benjamin Moore sell a dedicated high-performance acrylic metal primer for exactly this job, and pairing it with a quality exterior topcoat is what gives the door its longevity.
The order and technique that avoids brush marks
This is what separates a professional-looking door from a streaky one. A paneled steel door has distinct sections, and you paint them in a set order so wet paint always blends into the next area rather than drying into a visible edge.
| Paint in this order | Why |
| 1. Recessed panels | The detailed insets, done first with a brush so overspill blends into the flat areas next |
| 2. Vertical center pieces | The mullions between panels, brushed and rolled in their long direction |
| 3. Horizontal rails | Top, middle, and bottom cross pieces; brush toward the stiles and blend the overlaps |
| 4. Outer stiles and edges | The long side pieces and the door’s edges, in long sweeping strokes |
The technique that kills brush marks is simple: roll and tip. Roll a thin, even coat onto a section with the foam roller, then immediately “tip off” by lightly dragging a barely-loaded brush across the wet paint in one direction to smooth the roller texture. Speed matters, work each section while it is still wet, because dragging a brush through half-set paint is what creates drag marks. A paint conditioner (a flow additive) can buy you a little extra working time and help the paint level itself.
Two small habits make a big difference here. First, keep a “wet edge”: always paint into the area you just did while it is still wet, rather than letting a section dry and then joining to it, which shows as a line. Second, on a smooth flat door with no panels, you can skip straight to rolling the whole face and tipping it off in long, top-to-bottom passes. The section order only matters when the door has panels to work around.
How to paint a steel door, step by step
With your metal primer and acrylic paint ready and a shady, mild day picked, work through these in order. The prep steps are not optional, they are where the finish is won.
- Remove hardware and, ideally, the door. Take off the knob, lock, and weatherstripping. If you can spare the door and your home’s security, tap out the hinge pins and lay it flat on padded sawhorses, which gives the smoothest result. If not, wedge it firmly and paint it in place.
- Clean and degrease. Wipe the whole door with a degreaser to lift grime, hand oils, and any chalky residue. Steel collects an invisible oily film that paint will not stick to. Rinse and let it dry fully.
- Treat any rust. Sand off loose rust down to sound metal, or apply a rust converter on stubborn spots. Bare or rusted metal must be primed, or the corrosion will bleed back through.
- Scuff-sand the surface. Lightly sand the whole door with fine sandpaper (around 120 to 150-grit) to dull the factory finish and give the primer tooth. Do not sand so hard you cut through to bare steel on galvanized doors, since scratches through the zinc coating can rust. Wipe off all dust.
- Tape and prime. Mask off glass, hinges, and anything you are not painting. Then prime with your rust-inhibiting metal primer, following the panels-first order: brush the panels, then the center pieces, then rails, then stiles. Let it dry fully, and add a second coat if the old color still shows.
- Paint the first coat. Apply a thin, even coat of your acrylic paint in the same order, rolling the flats with the foam roller and tipping off with the brush. Thin is the rule, a light coat that looks slightly patchy is correct. Let it dry per the label.
- Sand lightly and add the second coat. Once dry, a very light scuff with fine sandpaper knocks down any brush marks or lint. Wipe clean, then apply the second thin coat the same way. A third may help with bold colors.
- Let it dry before rehanging. Give the paint plenty of time, ideally 24 hours, before reattaching hardware and rehanging, or you will dent and mark the soft finish.
Mistakes that cause peeling and brush marks
Almost every disappointing steel-door job traces to one of these. Avoid them and the finish will look sharp and last.
- Skipping the metal primer. The top cause of peeling and rust. A rust-inhibiting metal primer is non-negotiable on steel.
- Not degreasing. Steel holds an oily film you cannot see. Paint over it and adhesion fails. Always degrease first.
- Painting in direct sun. Hot metal flash-dries paint, leaving brush marks and poor bonding. Work in the shade on a mild day.
- Loading on thick coats. Heavy paint sags, drips, and shows marks. Several thin coats give a smoother, tougher finish.
- Ignoring the section order. Painting randomly leaves dry edges that show as lines. Follow panels, centers, rails, then stiles, keeping a wet edge.
Conclusion
Painting a steel door is a high-impact, low-cost upgrade that comes down to respecting the surface. Clean and degrease it, treat any rust, scuff-sand and seal it with a rust-inhibiting metal primer, then build up two thin coats of exterior acrylic paint, working panels-first and tipping off the roller with a brush. Stay out of direct sun and let each coat dry. Do that, and your entry door goes from tired and chalky to a smooth, weather-tough finish that boosts the whole front of your home for years.
Frequently asked questions
Do you need a special primer for a steel door?
Yes. Use a rust-inhibiting primer made for metal, oil-based or a dedicated acrylic metal primer. Ordinary wall primer is not built for steel and can cause peeling and rust. This is the most important product choice in the job.
What kind of paint is best for a steel door?
A quality exterior 100% acrylic latex, ideally rust-inhibiting, in a satin or semi-gloss sheen. Acrylic flexes with the metal so it resists cracking, and satin or semi-gloss wears well and wipes clean.
How do you paint a steel door without brush marks?
Use a foam roller for the flat areas and “tip off” each wet section by lightly dragging a brush across it in one direction. Work fast while the paint is wet, apply thin coats, and stay out of direct sun.
Do you have to sand a steel door before painting?
Yes, a light scuff-sand with fine sandpaper dulls the slick factory finish so primer can grip. Do not sand through to bare metal on galvanized doors, as that can lead to rust. Wipe off all dust before priming.
Can you paint a steel door without removing it?
Yes, though laying it flat on sawhorses gives the smoothest result. If you keep it hung, wedge it steady, tape off the hardware and frame, and paint carefully in thin coats to avoid drips and runs.
Related Articles
How to Paint Glass Vases: Easy Steps for a Lasting Finish