
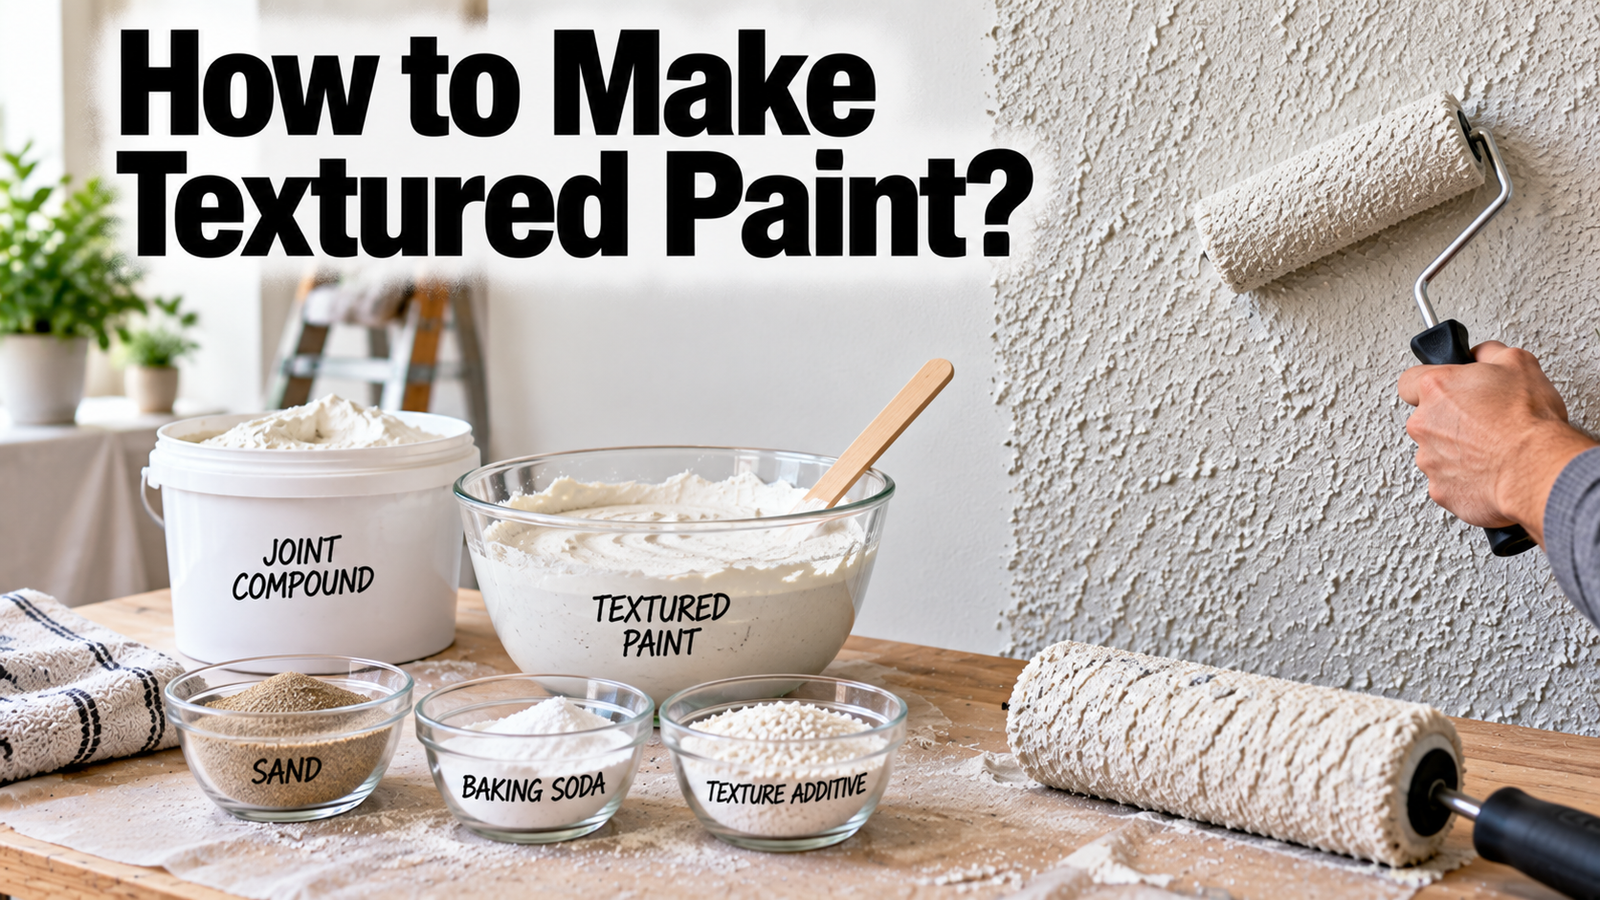

Making textured paint is as simple as stirring a texture additive into the paint you already have: baking soda (start with one part to two parts paint) for a matte, pottery-like finish, fine sand for stony grit, or joint compound for heavy, sculptural texture on walls and canvases. Mix until it spreads like thick frosting, apply in dabbed thin coats, and seal the result for durability.
- Why additives turn paint textured?
- Recipe 1: baking soda paint (the pottery look)
- Recipe 2: sand (the stone look)
- Recipe 3: joint compound (walls and textured canvases)
- Homemade texture pastes, and when to buy the real thing
- Tools and techniques that shape the texture
- Matching the recipe to the surface
- Coloring textured surfaces: drybrush and wash
- The rules that prevent cracking and flaking
- Ratio quick-reference
- Conclusion
- Frequently asked questions
- What can I add to paint to make it textured?
- What is the ratio of baking soda to paint?
- Does baking soda paint last?
- Can you mix joint compound with paint?
- How do you make textured paint for walls?
- Related Articles
Different additives suit different jobs, and one honest exception runs through this guide: for artwork meant to last, tint a ready-made acrylic molding paste instead of a kitchen mix. Here are the recipes with ratios, the tools and techniques that shape the texture, the rules that prevent cracking, and where each approach belongs.
Why additives turn paint textured?
A thirty-second detour into why this works makes every recipe adjustable. Paint is pigment carried in a binder, the glue that forms the film. When you stir in an inert filler like baking soda, sand, or compound, two things happen: the mix thickens so brush and knife marks hold their shape instead of leveling out, and the dried surface carries physical relief.
The trade-off is that filler dilutes the binder, so heavily textured mixes are weaker, more absorbent, and chalkier than plain paint, which is why the recipes below lean on sealers, and why the more filler you add, the more the mix behaves like plaster and the less like paint. Thickness also slows drying: textured coats need real patience between layers.
Recipe 1: baking soda paint (the pottery look)
The baking soda method is the one behind all those matte, rustic pottery makeovers, and it takes five minutes:
- Stir one part baking soda into two parts paint. Latex, chalk-style, and craft acrylic paints all work. For chunkier texture, push toward equal parts; for a smoother finish, add a splash of cold water until the grit relaxes.
- Aim for a thick frosting or brownie-batter consistency that holds its shape on the stir stick but still spreads under a brush.
- Apply by dabbing rather than long smooth strokes; dabbing builds the irregular, stone-like surface that makes the technique. Leaving visible vertical brush marks instead gives a hand-thrown pottery look.
- Build two to three coats, letting each dry completely; these thick coats take noticeably longer than normal paint.
- Finish the illusion, if you like, by dappling a second close shade over the still-wet surface for stone-like depth, or lightly sanding high spots once dry for a worn edge.
- Seal anything that will be handled with a clear matte topcoat. Baking soda is absorbent and taxes the paint’s binder, so unsealed pieces shed and mark; sealed ones hold up well as decor.
Know the limits: this is a decor finish, not an archival one. The soda-loaded film is more fragile than plain paint, which is fine for vases, pots, frames, and thrift flips, and wrong for artwork you care about in ten years.
Recipe 2: sand (the stone look)
Sand makes the grittier, stonier cousin. Stir small amounts of fine, clean sand (play sand or fine craft sand) into paint until you feel the grit you want, test on scrap, and apply in even coats; or paint the surface generously and sprinkle sand onto the wet coat, sealing it with another coat once dry.
For walls, skip the sandbox and buy a silica texture additive made for paint: it’s graded for even particle size, mixes predictably into a full gallon, and rolls on without clogging, giving hallway and ceiling paint a subtle slip-resistant grit that also hides minor drywall sins.
Recipe 3: joint compound (walls and textured canvases)
Joint compound (drywall mud) is the heavy machinery, and it works in two directions. Mixed into paint, a scoop at a time until the blend reaches thick pancake-batter consistency, it rolls or trowels onto walls as a true textured coating. Applied first and painted after, it’s the budget route to sculptural finishes: spread a layer over the surface with a putty knife, drag a grout comb, brush, or sponge through it for pattern, let it cure fully, then prime and paint any color. The same move built the entire textured-canvas trend: a thin layer of compound or flexible filler combed into arcs on an inexpensive canvas, dried and painted a single color, reads as a boutique art piece. On canvas, flexible filler or compound blended with white glue resists the cracking that straight mud can develop on a surface that bows.
Homemade texture pastes, and when to buy the real thing
For art projects that want a true modeling-paste texture, three homemade pastes cover the range. Equal parts white school glue and baking soda mix into a gritty, sculptable paste; equal parts cornstarch and water cooked until thick, then cooled, gives a smoother one; and acrylic gesso with fine sand stirred in makes a toothy textured ground you can paint over directly.
All three sand and shape well, and all three are for practice and play. The step up, and the honest recommendation for finished artwork, is a manufactured acrylic molding paste: these are 100 percent acrylic polymer products that stay flexible and durable as they dry, hold peaks and tool marks crisply, tint with any acrylic color, and can be sanded or carved once cured, and the same makers offer a whole family of texture gels and mediums, from pumice grit to fiber, for effects no kitchen mix reaches.
Kitchen pastes lean on glue and starch that stay absorbent and brittle; the acrylic versions are engineered to live on a flexing canvas for decades, and a single jar costs less than repainting one failed piece.
Tools and techniques that shape the texture
Whatever the mix, the tool writes the texture:
- A putty knife or palette knife lays down flat fields and pulls crisp peaks; press and lift for stucco-like stipple.
- A grout spreader or comb dragged in arcs, waves, or crosshatch makes the patterns behind most textured wall art.
- A sea sponge dabbed over wet texture gives soft, organic stone; a crumpled rag rolled through it gives leathery mottle.
- A stencil with paste troweled through it leaves raised motifs; lift straight up while the paste is wet.
- Texture rollers (or an ordinary roller over a compound-thickened paint) throw fast, repeatable patterns across whole walls.
Matching the recipe to the surface
Match the recipe to the surface and half the failures disappear. Glass and glazed ceramic, the classic vase-flip surfaces, are slick: wipe them with alcohol, scuff lightly if you can, and let the first thin textured coat dry fully before building, since the texture mix grips no better than its paint base does. Wood takes every recipe well once primed, and the texture conveniently hides grain and old repairs.
Metal needs a rust-inhibiting or self-etching primer first, because a thick absorbent texture coat over bare metal traps moisture against it. Canvas and anything that flexes want the flexible mixes, compound cut with glue, flexible filler, or true acrylic pastes, rather than straight drywall mud. And on drywall, spot-prime patches and repairs before texturing, or they’ll telegraph through as dull patches in the finished sheen.
Coloring textured surfaces: drybrush and wash
Texture earns its keep when the coloring plays along. The move that makes every textured piece look intentional is drybrushing: once the base color is fully dry, load a nearly dry brush with a lighter shade and drag it flat across the surface so only the raised peaks catch it, snapping the relief into visibility.
The reverse trick, a thin dark wash flooded on and wiped back, settles pigment into the valleys for an aged, stony depth. Do both and a baking-soda vase reads like carved limestone. One planning note: white additives lighten your paint a shade or so, so mix a small test batch and dry it before committing a color you care about.
The rules that prevent cracking and flaking
Cracking and flaking are the two failure modes, and both trace to the same causes. Keep individual layers thin and build depth in stages, because one thick slab dries unevenly and splits as the surface shrinks over a still-wet core. Let every layer dry completely; textured coats can need a day where plain paint needed an hour. Prime bare or slick surfaces first so the heavy mix has something to grip, and on metal use a rust-inhibiting primer under the texture.
Finish decor and wall projects with a clear washable topcoat, which armors the weakened binder and makes dusting the inevitable texture crevices far easier. And before committing to a wall, test the recipe on a scrap board and let it dry fully; texture, sheen, and color all read differently dry than wet, and additives like baking soda lighten colors slightly.
Quick rule: thin layers, full drying, sealed finish. Every cracked textured project broke at least one of the three.
Ratio quick-reference
The quick reference:
| Additive | Starting ratio | Result and best use |
| Baking soda | 1 part to 2 parts paint | Matte, pottery-like; vases, pots, decor flips |
| Fine sand | Small amounts to taste | Stony grit; crafts, and (as silica additive) wall grip |
| Joint compound | To pancake-batter thickness | Heavy, sculptural; walls, textured canvases |
| Glue + baking soda or cornstarch | Equal parts | Homemade texture paste; practice and play pieces |
| Acrylic molding paste | Use as-is, tint up to ~10% paint | Archival peaks and relief; finished artwork |
Conclusion
Textured paint is one stir away: baking soda for soft matte pottery, sand for stone, joint compound for bold walls and canvases, and homemade pastes for play, each mixed to frosting thickness, applied in patient thin layers, and sealed where hands or dusters will find it. Save the kitchen recipes for decor and practice, spend a few dollars on real molding paste when the piece matters, and test on scrap before the wall. The additive sets the texture; the thin coats and the sealer are what make it last.
Frequently asked questions
What can I add to paint to make it textured?
Baking soda for a matte pottery finish, fine sand for grit, joint compound for heavy sculptural texture, or a purpose-made silica additive for walls. For artwork meant to last, tint an acrylic molding paste instead; it stays flexible and durable where kitchen mixes turn brittle.
What is the ratio of baking soda to paint?
Start with one part baking soda to two parts paint and adjust: more soda for chunkier texture, up to roughly equal parts, or a splash of cold water for a smoother blend. You’re aiming for a thick frosting consistency that holds its shape but still spreads.
Does baking soda paint last?
As sealed decor, yes: a clear matte topcoat protects it well on vases, pots, and furniture accents. Unsealed, the absorbent, binder-starved film sheds and marks, and it’s never an archival choice for artwork, since the soda weakens the paint’s own glue.
Can you mix joint compound with paint?
Yes. Add compound a scoop at a time until the paint reaches a thick pancake-batter consistency, then roll or trowel it on for wall texture. The other direction works too: spread compound first, comb in a pattern, let it cure, then prime and paint over it.
How do you make textured paint for walls?
Either stir a graded silica texture additive into wall paint for even, subtle grit, or thicken paint with joint compound for bolder patterns applied by roller, trowel, or comb. Test the mix on a scrap board first, keep coats thin, and prime bare drywall before starting.
Related Articles
How to Open a Paint Can Without the Mess?