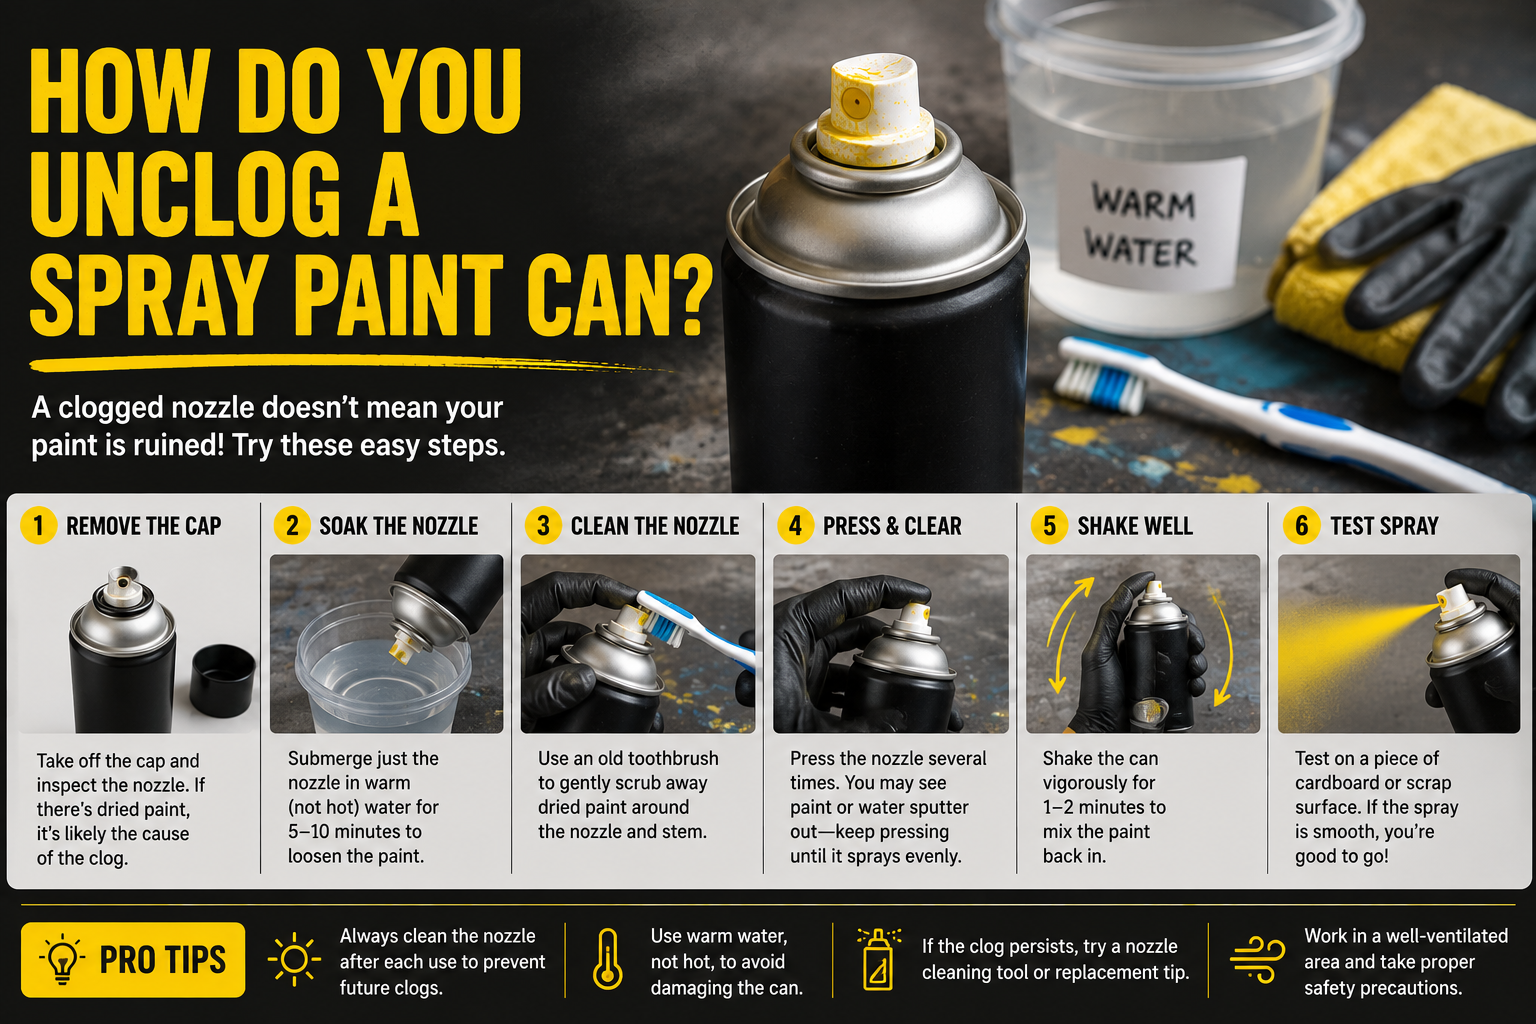

If you’ve ever grabbed a can of spray paint mid-project only to hear a hiss and see nothing but a sputter of air, you already know how frustrating a clog can be. So, how do you unclog a spray paint can without wasting the paint or the can itself? In most cases, the fix takes less than 15 minutes and only requires a few household supplies. This guide walks through exactly why cans clog, how to clear a blocked nozzle or valve, and how to keep it from happening again — whether you’re touching up a fence, finishing a furniture project, or working on an auto body repair.
- Why Spray Paint Cans Clog in the First Place
- How to Unclog a Spray Paint Can: Step-by-Step
- Step 1: Shake the Can Thoroughly
- Step 2: Clear the Nozzle with a Straight Spray
- Step 3: Remove and Soak the Nozzle
- Step 4: Clear a Stubborn Nozzle Hole with a Pin
- Step 5: Check the Valve Stem, Not Just the Nozzle
- Step 6: Use Compressed Air as a Last Resort
- Step 7: Try a Replacement Nozzle
- When It’s Not a Clog: Other Reasons a Can Won’t Spray
- How to Prevent Spray Paint Cans From Clogging
- Safety Precautions to Keep in Mind
- Frequently Asked Questions
- Final Thoughts
- Related Articles
Why Spray Paint Cans Clog in the First Place
Before troubleshooting, it helps to understand what’s actually happening inside the can. Spray paint clogs almost always come down to one of three culprits:
1. Dried paint on the nozzle tip. Every time you spray, a small amount of paint remains inside the nozzle opening. If it isn’t cleared, that residue dries and hardens, blocking the tiny hole the paint needs to pass through.
2. Paint residue inside the valve stem. Beyond the removable nozzle, there’s a valve stem seated in the can itself. Dried paint can build up here too, which is why simply swapping the nozzle doesn’t always solve the problem.
3. Unmixed or settled pigment. Spray paint is a suspension of pigment, resin, and propellant. If the can isn’t shaken thoroughly, heavier pigment particles can settle and thicken, making it harder for paint to move smoothly through the narrow spray path.
Less commonly, a can may seem clogged when it’s actually just low on propellant, or the internal dip tube has shifted away from the remaining paint. Knowing which situation you’re dealing with will save you time, so we’ll cover how to tell them apart below.
How to Unclog a Spray Paint Can: Step-by-Step
Work through these steps in order — start with the simplest fix and only move on if it doesn’t solve the problem.
Step 1: Shake the Can Thoroughly
This sounds basic, but it’s the most commonly skipped step. Shake the can vigorously for a full 60 to 90 seconds after you hear the mixing ball rattle. This isn’t just about hearing the ball move — it takes sustained shaking to fully re-suspend the pigment and blend it with the propellant. If you’ve been spraying intermittently, shake again every minute or two throughout your project, since pigment can start settling again as you work.
Step 2: Clear the Nozzle with a Straight Spray
Turn the can upside down and press the nozzle in short bursts, aimed away from your work surface (a rag or piece of cardboard works well). This clears the valve of paint and pushes clean propellant through the line. Keep going until the spray runs clear instead of colored. This step alone resolves many mild clogs.
Step 3: Remove and Soak the Nozzle
If shaking and clearing the valve doesn’t work, the nozzle itself likely has dried paint blocking the opening.
- Twist or pull the nozzle straight up off the can (most snap or twist off without tools).
- Drop it into a small cup of acetone, lacquer thinner, or mineral spirits. Let it soak for 10 to 15 minutes.
- While it soaks, gently scrub the nozzle opening with an old toothbrush or a stiff-bristled brush to loosen dried paint.
- Rinse the nozzle and check the opening by holding it up to a light — you should see a clear, unobstructed hole.
If you don’t have solvent on hand, warm (not hot) water can sometimes soften minor buildup, though it’s less effective on fully cured paint than a solvent-based cleaner.
Step 4: Clear a Stubborn Nozzle Hole with a Pin
For a nozzle that’s still blocked after soaking, insert a fine sewing pin, a straightened paperclip, or a specialty spray tip-cleaning tool directly into the spray hole. Work it in gently and rotate slightly to break up hardened paint. Avoid forcing a pin that’s too thick, since this can widen or deform the hole and change your spray pattern permanently. After clearing it, soak the nozzle once more to flush out any loosened debris.
Step 5: Check the Valve Stem, Not Just the Nozzle
If the nozzle is clean but the can still won’t spray, the clog may be in the valve stem itself. With the nozzle removed, look at the small metal stem protruding from the top of the can. Wipe it with a solvent-dampened cloth and gently press it in and out a few times to work loose any hardened paint inside. Reattach the (now-clean) nozzle and test again.
Step 6: Use Compressed Air as a Last Resort
If solvent and a pin haven’t cleared the blockage, a short burst of compressed air (like the kind used to clean electronics) through the nozzle can sometimes dislodge stubborn debris. Point the can away from your face and any surfaces, and use short bursts rather than one long blast.
Step 7: Try a Replacement Nozzle
Universal spray paint tips are inexpensive and widely available at hardware stores. If your original nozzle is damaged, warped, or simply won’t come clean, replacing it is often faster than continuing to troubleshoot. Just make sure you match the tip type to your can (fan spray, cone spray, or adjustable), since using the wrong tip can affect spray width and coverage.
When It’s Not a Clog: Other Reasons a Can Won’t Spray
Not every spray failure is a clog. Rule out these common look-alikes before you keep troubleshooting:
- Low or empty propellant. Shake the can and listen. If you hear liquid sloshing but no gas sound, or the can feels unusually light, the propellant may be spent even though paint remains — this can’t be fixed by unclogging.
- Dip tube misalignment. Many cans have a small marking (often a dot) near the rim. Aligning the nozzle opening with that mark repositions the internal dip tube so it reaches paint pooled at the bottom of a near-empty can.
- Cold temperature. Spray paint doesn’t perform well below roughly 50°F (10°C). A cold can may spray weakly or not at all — warming it gradually to room temperature (never with direct heat) often solves this without any cleaning.
How to Prevent Spray Paint Cans From Clogging
A few habits will dramatically cut down on clogs before they start:
- Wipe the nozzle after every use. Turn the can upside down and spray until the mist runs clear, then wipe the tip with a cloth. This single habit prevents most clogs.
- Store cans upright at room temperature. Extreme heat or cold can affect the propellant and paint consistency, making clogs more likely.
- Shake before every use, not just the first time. Even if you used the can yesterday, give it a fresh 60-second shake before spraying again.
- Avoid letting cans sit unused for long periods. Paint that sits for months or years is far more prone to settling and hardening. If you have partially used cans, try to use them up within a reasonable timeframe.
- Store nozzles separately if you swap them between cans. Keep a small container of solvent on hand so you can rinse a nozzle immediately after use if you plan to reuse it.
Safety Precautions to Keep in Mind
Unclogging a spray can involves solvents and pressurized contents, so a few precautions matter:
- Work in a well-ventilated area, ideally outdoors or near an open window, since acetone and mineral spirits produce strong fumes.
- Keep solvents away from open flames or sparks — both acetone and lacquer thinner are flammable.
- Wear gloves when handling solvents to avoid skin irritation, and avoid contact with your eyes.
- Never puncture, incinerate, or force open an aerosol can, even one that seems permanently clogged. These cans remain pressurized until fully empty.
- If a can truly can’t be salvaged, check your local municipality’s guidelines for aerosol can disposal or recycling — many areas require empty cans to be disposed of separately from regular trash.
Frequently Asked Questions
Why does my spray paint can sputter instead of spraying evenly? Sputtering usually means the propellant and paint aren’t fully mixed, or there’s a partial blockage in the nozzle. Shake the can for a full 60 seconds and clear the valve with a few test bursts before assuming it’s a full clog.
Can you unclog a spray paint can with hot water? Warm water can help soften light residue, but it’s much less effective than a solvent like acetone or mineral spirits on fully hardened paint. Avoid boiling or very hot water, since heating an aerosol can significantly raises internal pressure and creates a safety risk.
How do you know if a spray can is clogged or just empty? Shake the can and listen. If you hear liquid but the can won’t spray even after clearing the nozzle, it’s likely clogged. If you hear little to no liquid movement or the can feels very light, the propellant is probably spent.
Does soaking the whole can in solvent help? No — only the removable nozzle should be soaked. Submerging the entire can in solvent won’t reach the internal valve stem and can damage the can’s label or coating without fixing the actual clog.
How long should you soak a clogged nozzle? 10 to 15 minutes in acetone, lacquer thinner, or mineral spirits is usually enough to soften dried paint. Stubborn clogs may need a second soak combined with gentle brushing or pin-clearing.
Is it safe to use a pin to clear a spray nozzle? Yes, as long as you use a fine pin or wire and work gently. Avoid using anything thicker than the original opening, since this can enlarge the hole and change your spray pattern permanently.
Final Thoughts
A clogged spray paint can is almost always fixable without tossing the can or losing your project’s momentum. Start simple — shake thoroughly and clear the valve — then work through nozzle soaking, pin-clearing, and valve-stem cleaning if the basic fix doesn’t work. Building a habit of wiping the nozzle after every use is the single best way to avoid dealing with this problem again.
Next time you reach for a can that won’t spray, run through these steps in order before assuming it’s a lost cause — and if you found this guide helpful, bookmark it so you’ve got a quick reference ready the next time a can clogs on you.
Related Articles
How to Clean Oil Paint Brushes (Solvent & Oil-Free)
How to Clean an Oil Painting Safely at Home?