
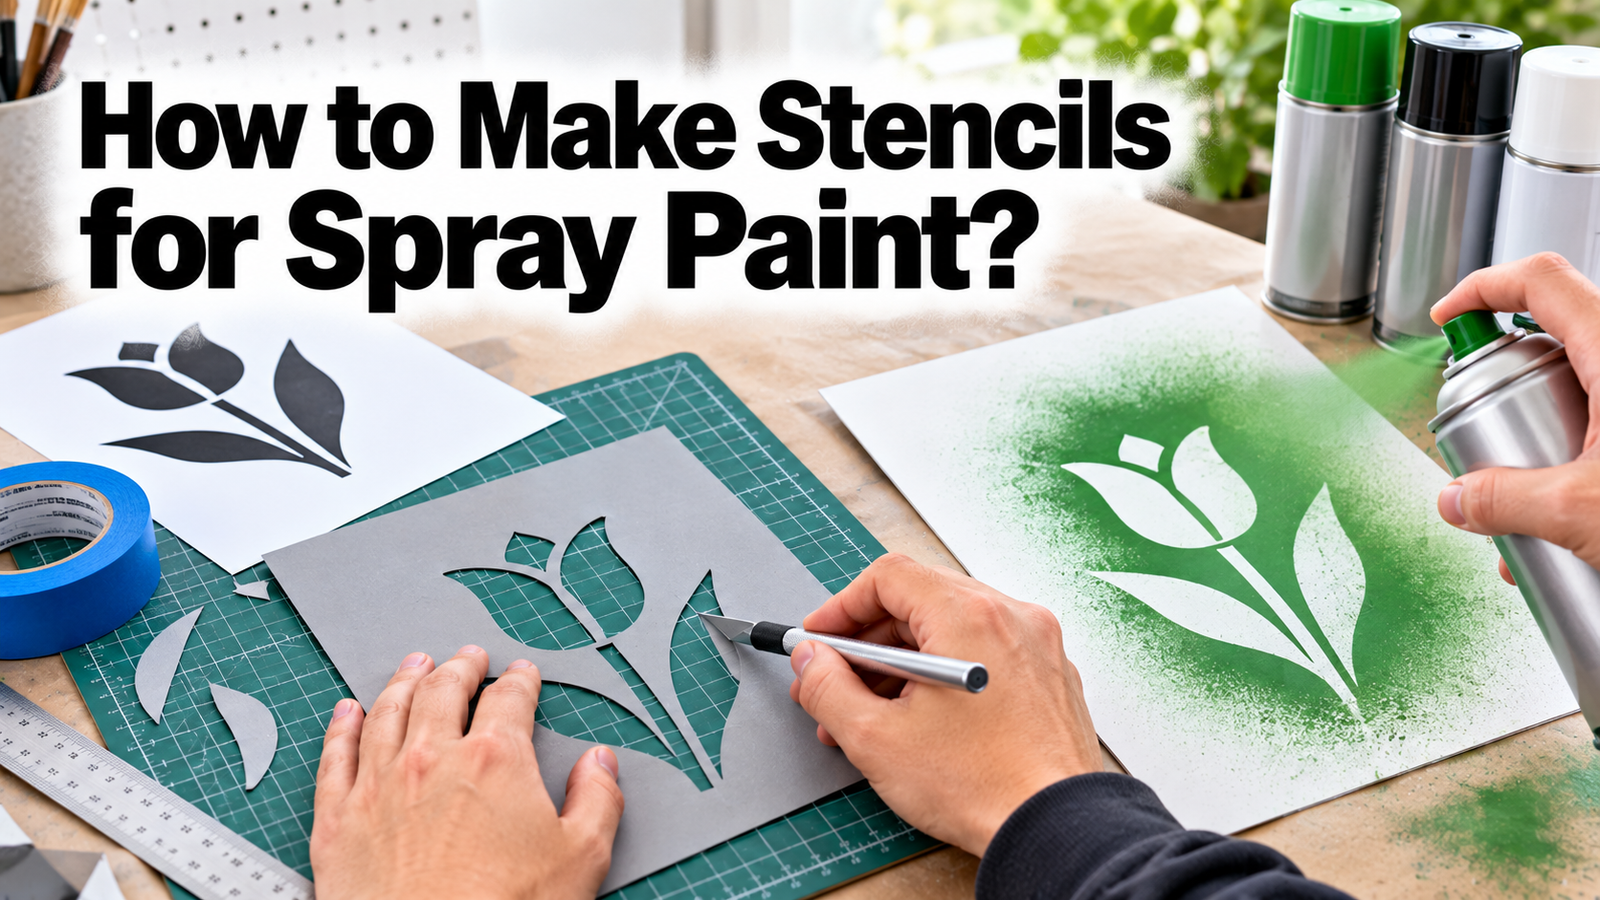

To make a stencil for spray paint, you print or draw your design, add small connectors called bridges so no part of it falls out, then cut it from a sturdy, water-resistant material like acetate or thin plastic using a sharp craft knife. That’s the whole idea. The part most people get wrong isn’t the cutting, it’s the bridges, and once you understand those, clean stencils get easy.
You don’t need a cutting machine or any special gear to do this well. A printout, the right sheet of material, and a fresh blade will get you sharp, reusable results. Here’s how to do it start to finish.
How do you make a stencil for spray paint?
Here’s the quick version, then we’ll go deeper on the parts that matter.
- Pick or draw your design. Bold, simple shapes work best. High-contrast images and chunky lettering are far easier than fine, detailed art.
- Add bridges. Wherever a piece of your design would be cut off from the rest of the sheet, leave a thin strip of material to hold it in place. More on this below, because it’s the key step.
- Transfer it to your material. Print or trace the design onto acetate, plastic, or card. Tape the paper down first so it can’t shift.
- Cut it out. Use a sharp craft knife on a cutting mat. Cut the small, detailed parts first and the big outlines last.
- Spray it. Tape the stencil flat to your surface and apply paint in light passes from the right distance.
Simple enough. The two steps that decide whether your stencil actually works are the material you choose and how you handle bridges, so let’s take those in turn.
What material works best for spray paint stencils?
The material sets how sharp your edges are and how many times you can reuse the stencil. Match it to your project.
| Material | Best for | Notes |
| Acetate or mylar sheet | Reusable stencils, sharp edges | Clear, so you can line up your design easily. Wipes clean and lasts for many uses. The go-to choice. |
| Thin plastic / vinyl | Reusable, curved surfaces | Flexible enough to wrap around objects. Durable and washable. |
| Cardstock or poster board | A few uses, quick projects | Cheap and easy to cut, but wet paint softens it after a handful of sprays. |
| Printer paper | One-time use only | Fine for a single design. It warps fast, so don’t count on reusing it. |
If you want a stencil you can use again and again, acetate is hard to beat. It’s clear, cuts cleanly, and shrugs off paint. For a one-off, paper or card is perfectly fine and saves you a trip to the craft store.
Bridges and islands: why your stencil falls apart
This is the concept that makes or breaks a stencil, and it’s the one thing beginners almost always miss. Cut the letter O out of a sheet and you get two things: an O-shaped hole, and a little oval of material that used to be the center. That center is an island, a piece completely surrounded by cut-out space, and it drops right out. Spray through what’s left and you get a solid blob instead of an O.
A bridge is the fix. It’s a thin strip of material you leave uncut, tying that floating island back to the rest of the sheet. It shows up as a small gap in the painted design, which is exactly why stencil lettering has that familiar broken look. That military-crate font isn’t a style choice, it’s engineering you can read.
The test for every design: is any part of it a hole with a separate piece floating in the middle? If yes, that piece needs a bridge, or it will fall out.
Getting bridges right comes down to size and placement. On paper or cardstock, keep each bridge at least an eighth to a quarter inch wide, or it will tear on the first pull. Too narrow and it snaps; too wide and it leaves an obvious gap in your design. For a bigger island, use two thin bridges opposite each other rather than one wide one, so the piece can’t pivot. Four is better still on anything larger than a coin.
Where you put them matters as much as how wide they are. Hide bridges where the eye already expects a break: at a corner, where a line changes direction, or along a fold. Placed well, they read as part of the design instead of a mistake. If you’re working from a photo or logo, plan your bridges before you cut, not after, because once the island is gone you can’t add it back.
How to cut a clean stencil?
With your design bridged and transferred, cutting is mostly about the right tool and a bit of patience.
- Use a sharp blade. A fresh craft knife or hobby knife gives clean edges. A dull blade drags and tears the material, which shows up as ragged lines in your paint. Change the blade the moment it stops slicing easily.
- Work on a cutting mat. A self-healing mat protects your table and lets the blade bite properly. A thick piece of cardboard works in a pinch.
- Cut small details first. Do the tight interior shapes while the sheet is still whole and stable. If you cut the big outline first, the piece flops around and fine cuts get messy.
- Pull the knife, don’t push it. Draw the blade toward you along each line and turn the material, not your wrist, on curves. Slow, steady passes beat fast, forceful ones.
- Leave a border. Keep a few inches of extra material around the design. This catches overspray and gives you something to tape down without covering your surface.
For very detailed or repeated designs, a craft cutting machine like a Cricut can cut the shape for you from a digital file, and its software can even flag islands that need bridging. It’s not required, but it saves time if you make stencils often. By hand, patience is the whole trick, and a fresh blade does most of the work.
How to spray it for crisp edges?
A good stencil can still bleed if you spray it wrong. Clean edges come from holding the stencil flat and building up paint gradually.
First, secure the stencil. Tape it down all the way around with painter’s tape so no edge can lift. Any gap between the stencil and the surface lets paint creep underneath and blurs your lines. On a flat wall, spray adhesive on the back of the stencil holds it even tighter. For a repeating pattern, use a level so your first placement is straight.
Then spray in light passes. Hold the can about 10 to 15 inches away and use short bursts, never a long continuous stream. Keep your hand moving and build the color up over two or three light coats instead of trying to cover it in one. Too much paint at once is what pools and seeps under the edges. Aim straight at the surface, not from a steep angle, so paint doesn’t get pushed sideways under the stencil.
Peel while it’s tacky, not wet or dry: wait about a minute after your last pass, then lift the stencil straight up and away, not sideways, so it can’t smear.
Always spray outdoors or in a well-ventilated space, wear gloves, and lay down cardboard or a drop cloth to catch the overspray. If you’re reusing the stencil, wipe it clean before the paint dries so it’s ready for next time.
Common mistakes to avoid
A few small habits separate a crisp result from a smudged one. Spraying too close is the big one; it floods the design and pushes paint under the edges, so keep your distance. Holding the button down for a solid coat is the next; short bursts and light layers win every time.
Forgetting bridges is the mistake that ruins the stencil before you even paint, so plan them in from the start. And skipping the tape, letting the stencil shift or lift mid-spray, turns clean lines fuzzy. Pin it down, keep your passes light, and lift it cleanly, and your design comes out sharp.
Conclusion
Making a spray paint stencil is simple once you know the one rule that matters: any floating piece of your design needs a bridge, or it falls out and ruins the shape. Pick a sturdy material like acetate for reuse, add your bridges, cut with a sharp blade smallest details first, then spray in light passes from 10 to 15 inches away. Do that and you’ll get clean, reusable stencils you can use on walls, signs, shirts, and more.
Frequently asked questions
What is the best material for a reusable spray paint stencil? Acetate or mylar. Both are clear, so you can line up your design easily, and they wipe clean and last for many uses. Thin plastic works well too, especially on curved surfaces.
What are bridges and islands in a stencil? An island is a piece of your design surrounded by cut-out space, like the center of an O, that would fall out. A bridge is a thin strip of material you leave uncut to hold that island in place.
Can I make a stencil without a Cricut or cutting machine? Yes. A printed design, a sheet of acetate or card, a cutting mat, and a sharp craft knife are all you need. A machine just saves time on detailed or repeated designs.
How far away should I hold the spray can? About 10 to 15 inches. Closer than that floods the design and pushes paint under the edges. Use short bursts and build the color up in two or three light passes.
How do I stop spray paint from bleeding under the stencil? Tape or use spray adhesive so the stencil sits flat with no gaps, spray straight on rather than at an angle, and keep your coats light. Bleed comes from a lifted edge or too much wet paint.
Related Articles
How to Thin Paint for a Spray Gun: Ratios by Paint